Nature-Scapes Quilting & Design
Leading Technique
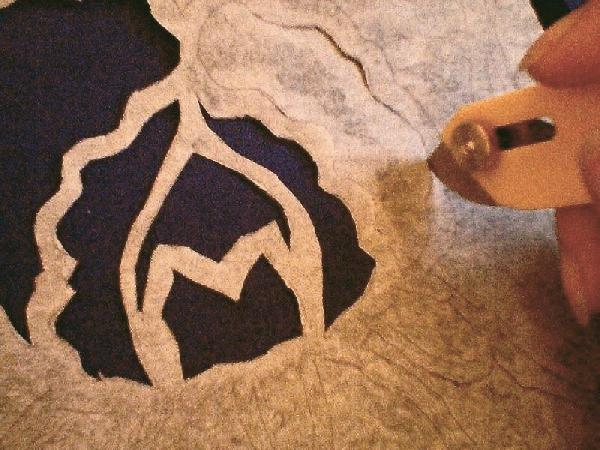 |
Lay Wonder Under Fusible Web over leading and appliqué pattern following manufacturers directions and trace. Apply to wrong side of fabrics. For Leading only use a poly/cotton blend (it frays less than cotton) Using an Olfa Point Cutter and scissors for curves and tight spots..or just scissors..start in the centre of the pattern and cut out the pieces around the leading, finishing at the outer edges. Remove web paper from leading and appliqués. Hint: start cutting leading shortly after you've applied the webbing as the webbing is more secured. |
 |
Lay leading loosely on your foundation and slip the appliqués (with fusing paper removed) under the leading. Starting from either the top or bottom, position leading over the edges of the appliqués repositioning as necessary. Pointed scissors help move the appliqués under the leading. |
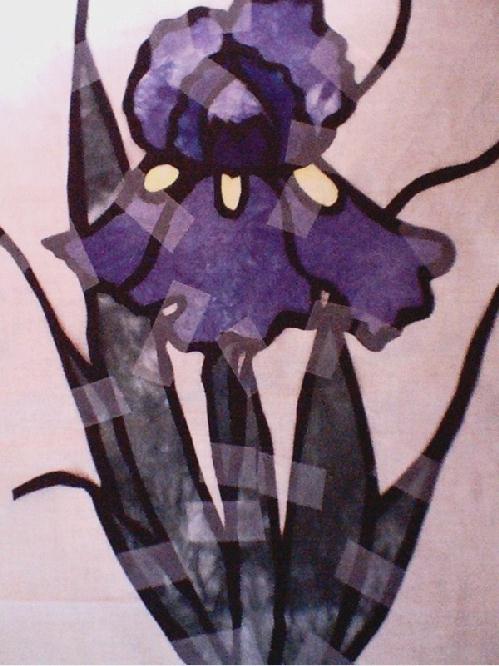 |
Once in place use tape(gift wrapping type of tape) and tape the leading and appliqués down into position. Once leading and appliqués are in place...follow manufacturer's instructions and keeping a damp cloth between the iron and the quilt top, fuse the leading and appliqués to the foundation. Remove tape asap. Once this is done set your machine up to do a zig zag stitch. (I use a Satin Stitch setting - loosened to a longer stitch length) |
 |
Put Stabilizer (copy paper will work) under your quilt top and sew the leading using an embroidery needle keeping most of the stitch width on the leading. If you loosen the pressure a small amount on your foot it will help you turn corners and curves much more easily. As you reach corners and points decrease the stitch width and increase back to the regular width going up the other side of the leading. |
When done straighten edges and add borders. Layer batting and backing and quilt. See our pattern insert for more detail.
Please feel free to contact us with your comments or questions.